Mood boards have been around for a long time. They were first used in the early 20th century by designers and artists as a way to collect and organise concepts for their work. It’s all about inspiration and exploring ideas of style, colours, materials, and the overall feel of a room or project. Material samples can include joinery, benchtops, feature ideas, hardware, tiles, flooring, and textiles or any related forms of influence behind the design.
Mood boards are an essential step in establishing a clear creative direction, allowing you to experiment with different elements that you want to incorporate into your space and visualising how these materials interact together before the project begins. They allow you to explore the various combinations of physical materials until you have clarity in the selections you make.

The best time to start creating a mood board is in the planning stage of your project, before any physical work has commenced, however they can be used at any time throughout the project if you need clarity or want to make any adjustments to your selections.
Creating a mood board is a process, but a crucial one, and it can take time to accomplish the look and feel you want to achieve in the space. Doing this early enough will give you time to determine your theme, gather lots of inspiration, begin exploring specific products you are wanting to use, and order samples from different suppliers.
Mood boards are essential in the design process because they help clearly communicate your ideas to joiners or anyone who is working with you on your project, and to ensure that everyone is on the same page when it comes to the design direction. It also allows for collaborative feedback on the products or colours being used.
Here are some key things to keep in mind when creating a mood board:
1. Establish your vision and mood
Start by defining your overall mood by determining how you want your space to feel – whether it’s warm and homely, a tranquil escape, or intimate and inviting. The inspiration section on our website is a terrific place to start. You can search colour combinations and flat lays to view which colours work well together. Pinterest is also a helpful tool in helping to gather ideas and polytec has hundreds of inspirational boards and images to get you started.
2. Gather inspiration
Collect images, colours, patterns, and textures that coincide with the mood you’ve chosen. A good place to start for inspiration is the polytec website by searching through the inspiration, gallery, and projects sections. The gallery and projects sections show completed projects using polytec products. You will begin to get ideas on common themes and products you are drawn to, which will help you determine your final style.
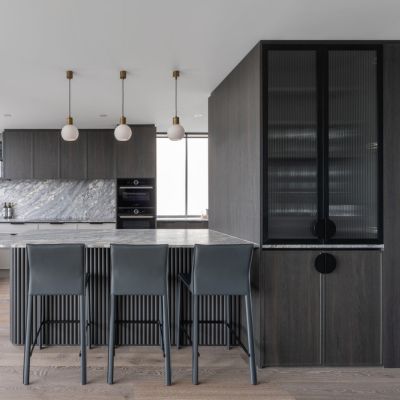
For example, for a modern and moody kitchen, could mean you explore products such as polytec Steccawood in Black Woodmatt, Xenolith Calacutta Grey and Sussex Themolaminated door profile in Estella Oak Woodmatt. polytec offer a range of free colour samples to give you a true indication of the finish, feel and tone, and can be ordered online.
3. Choose a colour scheme
Select a colour scheme that fits with the mood you’re trying to create. This can be done by choosing a main colour or feature such as your benchtop, then drawing inspiration from this to find complementary colours to create a cohesive palette.
polytec's Inspiration can be used to search colours with Mood Boards, Flat Lays, and Colour Collections available to help you select and gain ideas of which colour combinations work well together.

4. Source materials
Once you have a clear understanding of your vision for the space, you can begin to source materials you wish to incorporate in your design. A checklist of each element is a helpful way to keep you on track with not only the decorative elements but the practical elements too.
Obtaining product samples is the best way as this will indicate true colour, finish, and tone. You can order free polytec samples online, which allows you to see the colour and finish within your project as well as visualise this with the other elements within your space.
5. Arranging your selections
It’s time to start layering your materials and experiment with layout. Begin the process with any non-negotiables that you know will be appearing in your final project. From there, you can try different options and start the process of elimination, making sure each element is working together, creating a cohesive range of selections.

It’s important to assess the scale of each piece and how it will be used in your project, as well as determining where elements will overlap, so that you can place these samples close to each other on the mood board.
Viewing your mood board in the appropriate lighting is also fundamental in making sure you are getting the right idea on how your selections will appear together in your completed space.
Embrace the creative process and do what feels right for you. There is no right or wrong answer, so have fun exploring different options before settling on a final design.
polytec have introduced Mood Board of the Month, which highlights a colour and style combination for the month. polytec have everything you need to get started on your design journey – whether you’re renovating, building a new home, or specifying for a commercial project, polytec loads you with the tools for inspiration. Mood Board of the Month will enlighten you with inspiration for the variety of design styles that are available.
If you want help with deciding on which polytec products will align with your concept, give you guidance and confidence in your selections, then you can book a free Online Consultation. Alternatively, you can visit your local polytec Selection Studio to discuss your ideas.


